Tuesday, November 9, 2010

seeds: november garlic planting!

today we bundled in sweaters and planted garlic at recess time!

Garlic is a member of the allium family which also includes leeks, shallots and onions. Individual cloves act as seeds. The bulbs grow underground and the leaves shoot in to the air. Although garlic is traditionally thought of as a Mediterranean ingredient garlic is also grown successfully in colder more Northern climates.

There are many different garlic varieties, a lot of which you can easily grow at home for a great crop.

How to Grow Garlic at Home

Garlic is grown from the individual cloves. Each clove will produce one plant with a single bulb - which may in turn contain up to twenty cloves. Growing garlic is therefore self-sustaining. When planting garlic, choose a garden site that gets plenty of sun and where the soil is not too damp. The cloves should be planted individually, upright and about an inch (25 mm) under the surface. Plant the cloves about 4 inches (100 mm) apart. Rows should be about 18 inches (450 mm) apart.

As garlic reaches maturity, the leaves will brown then die away. This is the cue that it is time to harvest your garlic crop. If you harvest too early the cloves will be very small, too late and the bulb will have split. 

When to sow

warm temperate areas - generally speaking, it can be planted in autumn through to early winter. Under warm temperate climatic conditions autumn planted garlic will remain dormant for a few weeks, then develop roots and a shoot. With the onset of the cold of winter growth is fairly slow until temperatures warm in spring. The cold of winter is needed to initiate the side buds that will ultimately grow and swell to become cloves (and in some types, to initiate the flower bud). The lengthening days of spring are the signal for the initiated but undeveloped side buds to start forming into cloves. It is possible to sow in early spring and get a reasonably good harvest, but everything is against you - wet, difficult to work soil; no early root growth; less exposure to winter chill. Early Spring is possible, but definitely a second choice.
Temperate areas- plant after the first good frosts of autumn. Spring planting is possible in the higher latitudes, as the longer day lengths promote bulbing, but the shorter season means the bulbs are often smaller. Autumn garlic will produce roots, but either no, or short, top growth. If the garlic sprouts have emerged, they will survive freezes and snowfalls, but they should be mulched heavily (about 15 cm/6 inches) to prevent heaving. Pull the mulch aside in spring. Autumn planted garlic will have strong roots by winters icy grip, and these roots will help prevent the 'seed' being pushed out of the ground as the soil alternately freezes and thaws ('frost heave'). 

How to sow

Choose the biggest and fattest seed cloves, and sow them root end down, standing erect, and far enough in the soil that they are anything from just buried to being 25 mm/an inch or so under the soil surface. Put them about 100 mm/4 inches apart.

The tricks of growing satisfactory bulbs

Home grown garlic can be disappointing- small bulbs, bulbs with only one big soft clove, no bulb. The causes of unsatisfactory production come down to the quality of the 'seed', growing conditions, the variety, the vagaries of the season, and disease. give the best possible drainage. It is important to have a free draining soil. While cloves put in early in winter will have a longer cold treatment and will respond to lengthening days more quickly than those put in later, there is always a risk of the cloves rotting in a cold wet soil. Especially if the cloves are of dubious quality, or if you have a history of disease problems in your own saved seed cloves. Commercially, the seed cloves are often soaked in rugged fungicides prior to sowing to minimize this problem, but this is not an option for most of us. Excellent drainage is very important to give the edge on climate and disease.


give your plants an unreasonable advantage. Your garlic is likely in a race against root rotting disease and stem and leaf diseases. The better the leaf growth before bulbing starts, the bigger the bulb and the cloves will be. This translates to 'early care pays dividends later'. And also at the main growing stage, give your garlic every advantage to grow more than the disease will damage. Provide a free draining soil by amending it with sand, potting mix, well finished compost, leaf mould, or whatever. Consider a raised bed, or large tub culture. Before sowing, beef up the nutrient status of your soil by working in a complete fertilizer (5N - 10P - 10K) at about 225gms/half a pound per 7.5 Metres/25 feet of 30 cm/12 inch wide row. Once they have started growth in spring, give them regular - say fortnightly - very light side dressings of urea (or other high nitrogen fertilizer), spread 100 mm/6 inches either side of the plants. Liquid manures are also beneficial. Garlic competes poorly with weeds. Keep them as close to meticulously weeded as is possible. Be careful with the hoe- there is nothing more tragic than a beautifully growing garlic plant sliced off at soil level by a hurried hoe! If the weather is dry, mulch them to conserve water. Dry soil when the leaves are developing affects the yield quite badly, so water them well and regularly in dry periods.


The plants are ready to harvest when the foliage has died off, or mostly died off. If it is very wet near harvest time, consider lifting them a bit earlier and drying them under cover. Left in wet soil, the outer parchment often rots. And if there is disease in the root plate, it may develop too far and cause the bulb to fall apart when it is lifted. Rocambole is almost always ready to harvest a month or so before common garlic. But the state of the foliage is the indicator, not any particular date. 
our sunflower seed harvest!


Tuesday, September 7, 2010

day of service!

today we worked with the oberlin first years for their day of service and made many improvements on our garden! we made a beautiful path around our herb spiral, added rich compost and mulch to our beds, and planted beets, lettuce, leeks and broccoli. thank you first years!


many hands make light work!

our beautiful river rock path beside the newly mulched and seeded beds...


 beds mulched, weeded and ready for more seeds!

Tuesday, August 31, 2010

herb spiral

herb spiral day

in may: 


and now.. in august!


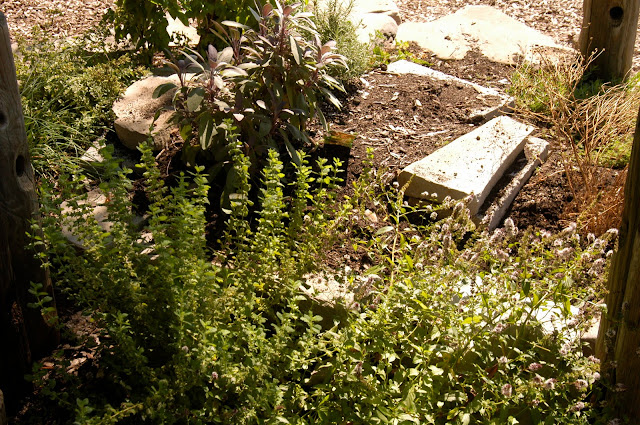
in may we built an herb spiral out of sandstone, compost and leaf mulch. we used an old taken apart sidewalk and planted a whole bunch of medicinal and culinary herbs. 


The Herb Spiral offers a variety of niche's for the herbs, at the top in the middle is the dryest soil suitable for Rosemary, getting wetter as the water drains down towards the bottom. Some of the spiral might be shaded by neighbouring bushes, or if something big like bay-leaf is planted, then it will give shade.  Take up the niches between the rocks with small herb ground covers like Pennyroyal. Rampant herbs like Basil in the sub-tropics, are better planted outside the spiral. While the herbs are growing to full size, some of the space between them can be taken with small annuals like Rocket.


Construction: Choose a site close to the kitchen entrance, herbs are best when freshly picked during cooking. The site should get sun, although its fine if part is shaded. This should not be a spot where water pools. Lay out the cardboard in the spiral, this will stop weeds growing up around the rocks, you don't need it in the areas where you will be piling soil.. Arrange the rocks on the cardboard, traditionally the spiral goes in the same direction as water goes down the plug, i.e.clockwise,  in the northern hemisphere and anti-clockwise  in the southern. The end of the spiral can be blocked with a rock, or you can construct a small pond there, for example a tyre-pond, with a tap over it. As you wind the spiral, you can fill the middle (see the diagram), the small rocks, gravel and coarse sand both ensure drainage and hold heat in the soil. In dryer climates some people just fill with soil and top with compost. When filling with compost pile it high above the rocks, and then wash it down with a hose. 


Friday, August 20, 2010

trellises, raspberries and peas

Today was the first day of spring. The sun shown brightly and the crisp air made our noses red and runny. We made trellises out of wood pieces and planted peas into our freshly aerated soil.


Earth teach me to forget myself as melted snow forgets its life. Earth teach me resignation as the leaves which die in the fall. Earth teach me courage as the tree which stands all alone. Earth teach me regeneration as the seed which rises in the spring. 

William Alexander


Saturday, August 7, 2010

the native plants we harvested today

weeds?  no way!   we prefer to call these beneficial (and useful) native plants that grow beside our crops guests.  today we found a whole bunch of different native plants and harvested them with thanks. 

1. wild lettuce


2. wild grasses: foxtail, wild oat and bunch grass


Oatstraw is rich in calcium and synergistic minerals and vitamins needed for building bones.  It reduces cholesterol and improves circulatory functioning. It is a nervine, that nourishes strong nerves, helps people deal with stress (Vitamin B complex), maintains restful sleep patterns and reduces the frequency and duration of headaches.

3. chickweed


  Chickweeds are Medicinal and edible, they are very nutritious, high in vitamins and minerals, can be added to salads or cooked as a pot herb, tasting somewhat like spinach. The major plant constituents in Chickweed are Ascorbic-acid, Beta-carotene, Calcium, Coumarins, Genistein, Gamma-linolenic-acid, Flavonoids, Hentriacontanol, Magnesium, Niacin, Oleic-acid, Potassium, Riboflavin, Rutin, Selenium, Triterpenoid saponins, Thiamin, and Zinc. It can be applied as a medicinal poultice and will relieve any kind of roseola and is effective wherever there are fragile superficial veins or itching skin conditions

4. plantain 

Among its many qualities, the common plantain is popular as a healer of wounds and injuries as well as a remedy for most poisons. In addition, the herb is known as a ‘body purifier’ and cleans the system of heat, congestion as well as all toxic elements. 

5. dandelion 


 Dandelion has remarkable nutritional value, being very high in vitamins A and C, with more beta carotine than carrots and more potassium than broccoli  or spinach, not to mention healthy doses of iron and copper for good measure.  Medicinally, Dandelions are considered very safe and effective as a general tonic that helps strengthen the liver, gallbladder, pancreas, spleen, stomach, and intestines,  improving bile flow and reducing inflammation in cases of hepatitis and cirrhosis.  Dandelions also help to dissipate gallstones and are believed to improve kidney function, thereby improving overall health and clearing skin problems.

Dandelion tea is made by grinding roasted roots, and makes a nice substitute for regular coffee, but without the caffeine


worms, cover crop and winter's here...

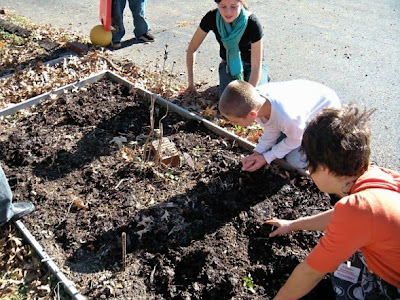
In preparation for the cold winter months, we had to get the soil nice and fed so that it would be fertile and healthy by the time we planted our crop in the spring. We did this by weeding away all of the native plants that had taken over the beds and mixed them into the soil so that their nutrients cold feed the dirt.... Then we used the help of worms!
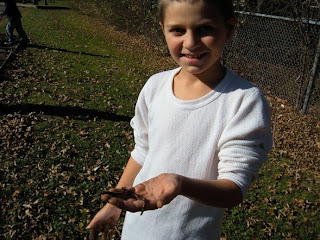
Worms help to increase the amount of air and water that gets into the soil. They break down organic matter, like leaves and grass into things that plants can use. When they eat, they leave behind castings that are a very valuable type of fertilizer! Hurray for worms!
                   The trusty worms, here to do their job!
The three major benefits of earthworms to our soil:

  • Biological. In many soils, earthworms play a major role in converting large pieces of organic matter like dead leaves into rich soil, and thus improving soil fertility. This is achieved by the worm's actions of pulling down below any organic matter either for food or to plug its burrow. Once in the burrow, the worm will shred the leaf and partially digest it, then produce a worm cast. Worm casts can contain 40% more humus than the top 9" of soil in which the worm is living. 
  • Chemical. As well as dead organic matter, the earthworm also ingests any other soil particles that are small enough—including stones up to 1/20 of an inch across! When the worm excretes this in the form of casts which are deposited on the surface or deeper in the soil, minerals and plant nutrients are made available in an accessible form. 
  • Physical. By ts burrowing actions, the earthworm is of great value in keeping the soil structure open, creating a multitude of channels which allow the processes of both aeration and drainage to occur. The earthworm not only creates passages for air and water to traverse, but is itself a vital component in the living biosystem that is healthy soil. Earthworms continue to move through the soil due to the excretion of mucus into the soil that acts as a lubricant for easier movement of the worm. 

Then we planted a cover crop of red clover.....

A red clover cover crop has several benefits, including:


-Contributing up to 120 pounds of soil nitrogen for the following crop rotation
-Reducing soil erosion and surface water pollution
-Increasing soil organic matter, improving soil tilth and increasing water holding capacities
-Reducing grass pressure on soil

    and, low and behold, just days later the sprouts emerge....


    from seeds to sprouts to a fruitful fall

    Fall: The (re)Birth Of The Garden


    "It is my belief that when young people are opened to living as a part of nature and living purposefully, they act on inspiration and become leaders of change."


    -Penny Livingston-Clark

    The goals of this learning garden are to foster personal connections between students and the environment, to provide a living example of where our food comes from, and to cultivate how we can incorporate ourselves into that cycle. In doing so we hope to awaken and build upon their curiosity to nature as well as seed a sense of environmental stewardship for the future. 
    our dear kate coury, the mother of the garden

           The Prospect Learning Garden was a project started by Virginia Dreier and Kate Coury in 2006 as a place for Prospect Elementary School Students to learn about and explore growing flowers, herbs and food.
         This past fall we taught workshops during the 3rd and 5th grade recess time. The workshops were centered on "weed" identification, medicinal plant uses, soil health, compost, beneficial insects, seeds, compost, and cover crops. The lessons were all very informal, personal, and structured around the students' interests. In the process of teaching, we prepared the garden space for winter. We weeded away invasive plants, nourished the soil with worm- filled compost, and planted each bed with a cover crop of red clover to keep nitrogen levels high during the winter months. We also made compost bins and informative signs to provide students with information about the garden and soil cycles.

           This fall taught us a lot about working within a community and at a school. Engaging the students during recess, made the garden a place of fun and creativity in a way that made spurred appreciation and curiosity. Our hope is that we can cultivate an understanding that can be nurtured throughout the year.